Whether you’re an aspiring blogger or a new eCommerce operator who has chosen WordPress, having a web host for your site will greatly help you in managing and keeping your website up-to-date and performing at its best. What better way to get started than learning the basics for your WordPress. This install WordPress plugins tutorial will give you three fast and easy options to safely add plugins to your WordPress site.
Did you know? What really makes WordPress come alive is the fact that there is a plugin for just about anything you can think of to make your website pop, gain visitors and retain customers! Let’s get started!
Table of Contents
Choose a Reliable Host!
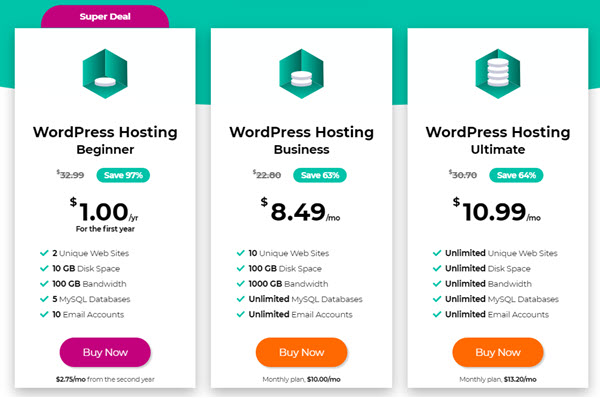
Choose MonsterHost as your WordPress hosting service. It’s perfect for beginners and comes with 2 unique websites, 10 GB disk space and gives you up to 10 email accounts.
After you’ve set up your WordPress site using MonsterHost, it’s now time to implement plugins to make your user experience more enjoyable. Though you’re a beginner, you should know by now what plugins are and what they are used for; but in case you’ve forgotten, we’ll refresh your memory.
What are Plugins?
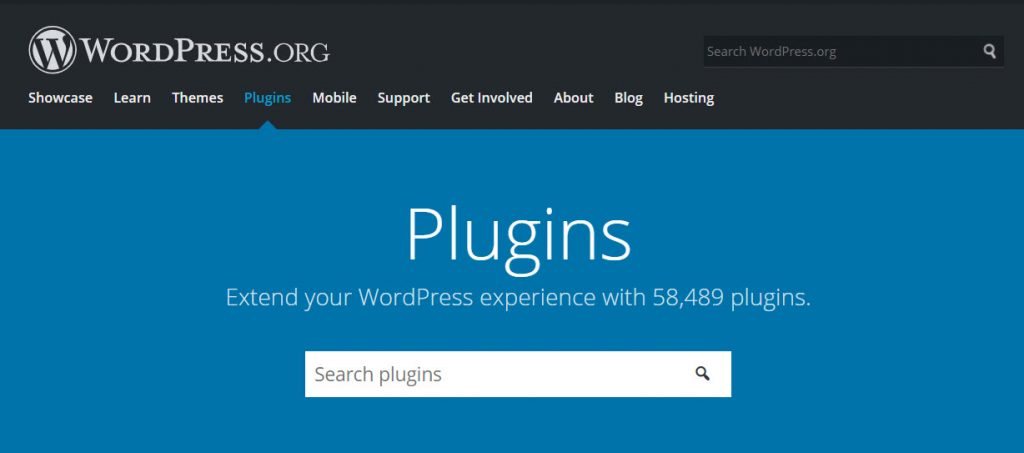
WordPress plugins are add-ons for your website. You can think of them as apps like the ones we install on our phones. When you install a plugin it adds new features to your website such as contact forms, linking social media accounts, language translators and the list goes on. There are tons of free plugins and a huge library of premium ones as well.
Knowing which plugin to choose is completely dependent on your website’s needs.
An important note!
Before we delve into our WordPress plugins tutorial, we should point out an important detail that you must keep in mind. If you happened to use WordPress.com as opposed to WordPress.org, then you will not be able to see your plugins in your dashboard.
You can solve this issue by switching from WordPress.com to WordPress.org. Here again, is where MonsterHost comes in. We will host your WordPress site while offering other high-quality features to ensure your website is secure and performs well.
3 Safe ways to install WordPress Plugins
Now for the meat of the matter; our WordPress plugins tutorials. Presently, there are 3 ways that you can go about installing plugins on your WordPress site. We’ll explore them below:
1. Use WordPress plugin search
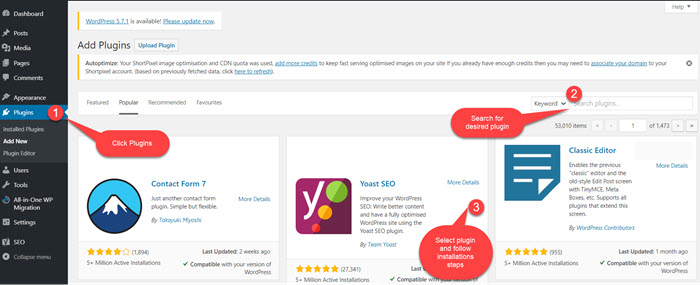
This is by far the most beginner-friendly way to install a plugin. However, the plugin you download must be included in the WordPress plugin directory.
- From your dashboard, choose the plugin option
- Select ‘Add New”
- From there you will see a page pop up and in the top right-hand corner you the option to search for the plugin you want to install
- When you type in the plugin you would like, you see other similar options pop up as well. Choose the plugin that is best for you
- Click ‘Install Now’
- WordPress will download and install the plugin you have chosen
- Once downloaded, the ‘Install Now’ option will change to an ‘Activate’ button
- Click the ‘Activate’ button to begin using your newly installed WP plugin
2. Use WordPress Admin plugin upload
With the upload option that we will now be discussing, every type of plugins.
- You will first need to download your desired plugin from its source on to your computer. It will download as a zip file
- From your dashboard, scroll down to plugins then select ‘Add New’
- You will then be taken to a new page, which will give you the option to ‘Upload Plugin’. You will select it
- A plugin upload form will appear and from here you will select the ‘Choose File’ option
- Choose the plugin you previously downloaded to your computer after which you will select the ‘Install Now’ button
- From here WordPress will install your chosen plugin and will prompt you with a success message when the upload is complete
- Select the ‘Activate Plugin’ link to begin using your newly installed plugin. Be sure to tailor it to your desire
3. Manually install a WordPress plugin using FTP
With MonsterHost adding plugins are easy and beginner friendly. But if you have ‘gone against the grain’ and are using another hosting website, there are rare cases where your hosting provider may have file restrictions. This file restriction could limit the ability you have in installing your plugin from the admin area.
To fix this, it’s best that you manually install your plugin, using FTP. This method is by far the least beginner-friendly but we will still explore this option just in case.
- First, download your desired plugin’s source file, which will be a zip file. This file will need to be extracted from your computer
- When you extract the plugin zip file it will create a new folder that has the same name. This will be the folder you will manually upload using the FTP client, to your website
- Once you gain access to the FTP manager through your webhost, you will open the FTP client on your computer, connecting it to your website using the login credentials your webhost will provide
- Once you are connected, you will need to go to /wp-content/plugins/folder on your website
- After that, it will now be time to upload the extracted zip folder to wp-content/plugins/folder on your webserver
- When the files have successfully uploaded, visit the WordPress admin area, click on the plugins link in the admin menu to see your newly installed plugin
- Click the ‘Activate’ link below the plugin to begin using it
Wrapping up
We hope our WordPress plugins tutorials have been helpful and you’ve learned how to install your desired WP plugins. Now you can use your WordPress website with even more ease.
If you are ready, you can sign up today with MonsterHost to receive 97% off your first year of them being your webhost. You can also build your website with us at special beginner rates starting at $1.00/month. Click below to start.
